Roof damage documentation is the systematic process of collecting visual and written evidence to support insurance claims and repair estimates. Done correctly, it determines whether your claim gets approved quickly or drags on for months. Homeowners who submit clear, detailed evidence tend to receive faster approvals and higher payouts. Organizations like the National Roofing Contractors Industry Association (NRCIA) and legal firms like Payne Law, PLLC confirm that documentation quality is the single biggest factor adjusters weigh when evaluating storm damage claims. This guide gives you the exact steps to build a record that holds up.
1. Essential roof damage documentation tips for photos and videos
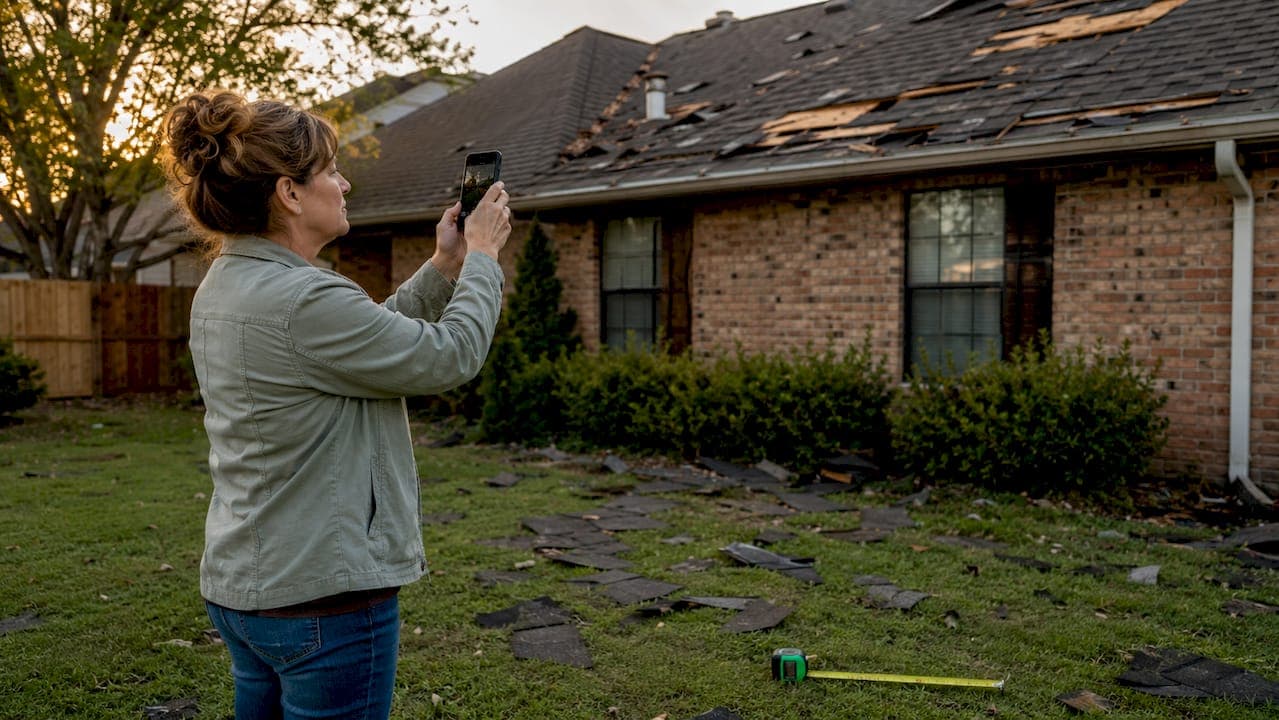
The foundation of any strong claim is visual evidence. Adjusters rely heavily on clear visual proof, and incomplete images delay processing and reduce claim strength. Your goal is to give the adjuster no reason to ask follow-up questions.
Start with wide-angle shots. As NRCIA recommends, wide context shots combined with close-ups show the full scope and location of damage. Walk around all four sides of your home and photograph the entire roofline from ground level before you move closer.
Follow this shooting sequence for every damaged area:
- Wide shot: Full view of the roof side or section showing the damage in context
- Mid-range shot: 6 to 10 feet from the damage, showing surrounding shingles, flashing, or gutters
- Close-up shot: Tight frame on the specific damage point, whether it is a cracked shingle, dented flashing, or puncture
- Scale reference shot: Place a coin or ruler next to the damage. Photographing impact marks with a coin or ruler nearby helps adjusters assess severity accurately.
Shoot in natural daylight whenever possible. Overcast light works better than direct sun because it eliminates harsh shadows that can obscure damage details. Aim for 50 to 100 photos across the full property, not just the roof surface. Include interior shots of any water stains, ceiling damage, or wet insulation.
Record at least two narrated video walkthroughs: one exterior and one interior. Speak clearly as you film, describing what you see and where you are standing. Video adds context that still photos cannot capture.
Pro Tip: Enable location tags and date/time stamps in your phone camera settings before you take a single photo. Time-stamped photos with GPS metadata are far harder for insurers to dispute than untagged images.
2. How to use official weather records to strengthen your claim
Weather documentation connects your roof damage to a specific storm event. Without it, insurers can argue the damage is pre-existing or caused by neglect rather than a covered peril. Using official weather data reduces disputes about causation in storm damage claims, especially in regions with high claim denial rates.
Here is what to gather and where to find it:
- National Weather Service (NWS) storm event records: Visit weather.gov and search storm events by your county and the date of the storm. Download and save the PDF report.
- NOAA storm documentation: NOAA's Storm Events Database at ncdc.noaa.gov allows you to filter by state, county, and event type. Look for hail size, wind speed, and storm path data.
- Local news archives: Screenshots or links to local news coverage of the storm add a layer of corroboration that adjusters appreciate.
- Hail reports from CoCoRaHS: The Community Collaborative Rain, Hail and Snow Network provides ground-level hail size reports submitted by volunteers across the country.
Save every document as a PDF and name each file clearly, for example "NWS_Hamilton_County_Storm_Report_April2026.pdf." Include these records in your claim package alongside your photos and contractor estimates. When an adjuster sees that a verified hail event with 1.5-inch stones passed directly over your address on the same date your damage appeared, the causation argument disappears.
3. What to include in an organized roof damage claim package
An organized claim package combining all evidence types and communications forms a compelling record that moves claims forward. Think of it as a case file, not a folder of random photos.
Build your package in this order:
- Photo and video library: Organized into subfolders labeled by location (front slope, rear slope, interior, gutters) and date
- Official weather records: NWS and NOAA reports for your county and storm date
- Professional inspection report: A licensed contractor's written assessment identifying all damage points. A professional roof inspection validates your own documentation with expert credentials.
- Itemized repair estimate: A line-by-line cost breakdown from a licensed roofing contractor, covering materials and labor separately
- Receipts for temporary mitigation: Any tarps, emergency repairs, or materials you purchased to prevent further damage
- Written communications log: Dates, times, and summaries of every call or email with your insurer, adjuster, or contractor
Pro Tip: Create a master index document listing every file in your package with a one-line description. Adjusters process dozens of claims at once. A clear index tells them exactly where to find each piece of evidence and signals that you are organized and serious.
A thorough written timeline of all claim-related communications supports dispute resolution if your claim is challenged or delayed. Log every interaction, not just the ones that feel significant.
4. Common mistakes that weaken roof damage evidence
Most documentation errors are avoidable. They happen because homeowners move too fast, either cleaning up damage or calling the insurer before they have captured enough evidence.
Avoid these specific mistakes:
- Cleaning up before photographing: Debris, broken shingles, and granule piles on the ground are evidence. Photograph them where they fell before touching anything.
- Discarding damaged materials: Never throw away cracked shingles, bent flashing, or damaged gutters until the adjuster has inspected them. Physical samples can support your claim.
- Skipping wide shots: Close-ups alone give adjusters no sense of scale or location. Without context shots, they cannot confirm where on the roof the damage occurred.
- Using poor lighting or blurry images: Blurry or dark photos get dismissed. If a shot is unclear, retake it immediately. Use your phone's HDR mode in low light.
- Forgetting metadata: Unclear images without timestamps or GPS data can delay or reduce claim payouts. Check your camera settings before you start.
One overlooked mistake is waiting too long. Chattanooga and the surrounding Tennessee Valley see frequent severe weather, and damage conditions change fast. Rain can wash away granule evidence. Wind can shift debris. Document within hours of the storm, not days.
If you are unsure what counts as storm damage versus normal wear, review the signs of storm damage specific to this region before you start shooting.
5. How to document temporary repairs without hurting your claim
Temporary mitigation is necessary and expected. Insurers do not penalize you for tarping a damaged roof or patching a leak to prevent further water intrusion. What they do scrutinize is whether you documented the original damage before making any repairs.
Temporary mitigation without prior documentation risks limiting claim scope. If your only photos show a neatly tarped roof, the adjuster has no visual record of what the damage looked like before you acted. That gap gives them room to minimize the payout.
Follow this sequence every time:
First, photograph and video the damage in its original state. Get every angle before a single tarp is unrolled. Second, photograph the tarp or temporary repair immediately after installation, showing its full coverage area and how it relates to the damaged section. Third, keep every receipt and invoice for materials and labor related to the mitigation. These costs are often reimbursable under your policy.
Write a brief explanation in your communications log describing what you did, why you did it, and when. For example: "April 14, 2026, 3:00 PM. Installed 20x30 ft polyethylene tarp over northeast slope to prevent water intrusion through three missing shingle sections. Photos taken before and after installation."
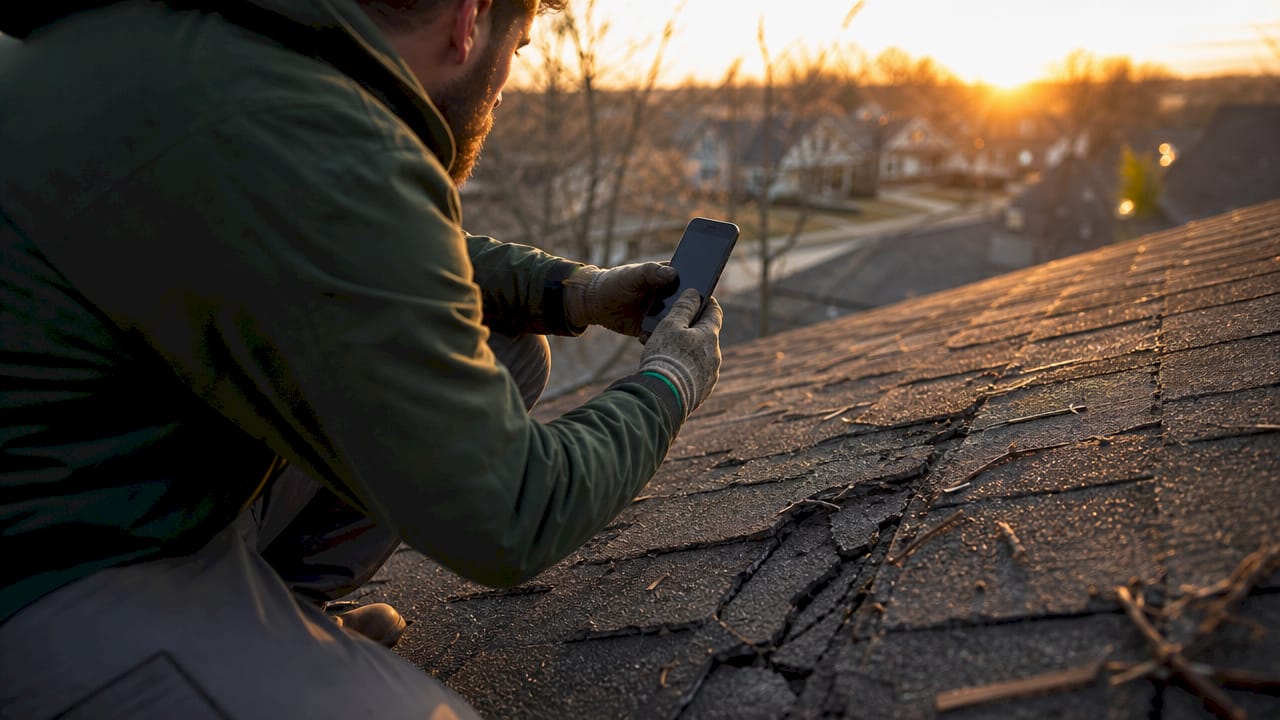
Pro Tip: Ask your roofing contractor to photograph the damage before they install any temporary fix. A contractor's dated photos carry more weight with adjusters than homeowner photos alone because they come with a professional inspection report attached.
Understanding structural repair implications before mitigation helps you identify which areas need the most thorough pre-repair documentation.
6. Using a roof inspection checklist to catch hidden damage
Visible damage is only part of the picture. Hail and wind storms routinely cause damage that is not apparent from the ground or even from a casual roof walk. A structured roof inspection checklist prevents you from missing damage that could cost you thousands in out-of-pocket repairs later.
Work through these areas systematically:
Shingles: Look for missing tabs, lifted edges, cracked surfaces, and granule loss. Granule loss often appears as dark, bare patches or as a heavy accumulation of granules in gutters. Shingle replacement needs are frequently underestimated without a close inspection.
Flashing: Check all metal flashing around chimneys, skylights, vents, and valleys. Hail dents flashing and wind lifts it away from the roof deck. Even small gaps in flashing allow significant water intrusion.
Gutters and downspouts: Dented gutters are one of the clearest indicators of hail impact. Granule accumulation inside gutters confirms shingle degradation. Document both with close-up photos.
Soffit and fascia: Wind-driven rain and debris damage these areas frequently. Photograph any cracks, holes, or paint peeling that appeared after the storm.
Interior: Check attic insulation for moisture, look at ceiling drywall for water stains, and inspect any skylights for seal damage. Interior evidence often seals a claim when exterior photos alone are borderline.
A licensed contractor conducting a 21-point inspection will catch damage points that most homeowners miss during a self-assessment. Professional documentation from a certified inspector adds credibility that your own photos cannot fully replace.
Key takeaways
Thorough roof damage documentation, built on time-stamped photos, official weather records, and an organized claim package, is the most direct path to a successful insurance settlement.
| Point | Details |
|---|---|
| Photograph in sequence | Capture wide, mid-range, and close-up shots of every damage area before touching anything. |
| Use scale references | Place a coin or ruler next to damage in close-up photos so adjusters can assess severity accurately. |
| Attach weather records | Download NWS and NOAA storm reports for your county and storm date to establish causation. |
| Document before mitigation | Always photograph original damage before installing tarps or making temporary repairs. |
| Assemble a complete package | Combine photos, videos, weather records, inspection reports, estimates, and a communications log into one organized file. |
What I have learned from years of watching claims succeed and fail
I have seen homeowners with genuinely severe storm damage walk away with reduced settlements, not because their roofs were not damaged, but because their documentation was thin. A handful of blurry close-ups and a verbal description do not move an adjuster. A 90-photo library organized by roof section, paired with an NWS storm report and a licensed contractor's inspection, does.
The mistake I see most often is homeowners treating documentation as an afterthought. They call the insurance company first, then scramble to take photos. By then, a contractor has already been on the roof, debris has been cleared, and the original damage condition is gone. The sequence matters as much as the content.
One thing that surprises most people: the communications log is often the most powerful document in a disputed claim. When you can show exactly when you reported the damage, who you spoke with, what they said, and how long the insurer took to respond, you shift the burden of proof significantly. Keep that log from day one, not after a dispute starts.
Safety is worth stating plainly. Do not walk a storm-damaged roof yourself unless you have proper footwear, a safety harness, and experience on pitched surfaces. Photograph from the ground and from ladders at the eave line. Let a licensed professional handle the full roof walk. The documentation value of a roof-level photo is not worth a fall.
— Steve
Get a professional inspection to back your documentation
Strong documentation starts with professional eyes on your roof. Chattanoogaroofrepairs provides comprehensive 21-point inspections across Chattanooga and the surrounding Tennessee Valley, giving you a certified contractor's written report to anchor your claim package. If your home took storm or hail damage, our team offers storm damage repair with same-day tarping to stop further water intrusion while your claim is processed. We work with GAF and Owens Corning materials, carry full licensing and insurance, and provide transparent, itemized estimates you can submit directly to your insurer. Schedule a no-pressure inspection at chattanoogaroofrepairs.com and get the documentation support your claim deserves.
FAQ
What photos should I take first after roof damage?
Start with wide-angle shots of all four sides of your home to establish context, then progress to mid-range and close-up shots of specific damage points. Wide shots combined with close-ups give adjusters both location and severity in a single photo set.
How many photos do I need for a roof insurance claim?
Aim for 50 to 100 photos covering the full exterior, all damage points, interior water damage, and debris on the ground. More evidence is always better, since adjusters cannot dispute damage they can clearly see from multiple angles.
Where do I get official storm records for my claim?
Download storm event reports from the National Weather Service at weather.gov and from NOAA's Storm Events Database at ncdc.noaa.gov, filtering by your county and storm date. These records establish that a covered peril occurred at your location on a specific date.
Can I make temporary repairs before the adjuster visits?
Yes, and you should to prevent further damage. Photograph the original damage thoroughly before any repair work begins, then document the temporary fix immediately after installation. Documenting original damage before mitigation is the step that protects your full claim scope.
Does a contractor inspection help my insurance claim?
A licensed contractor's written inspection report adds professional credibility to your documentation and identifies damage points you may have missed. Pairing your own photos with a certified contractor's report gives adjusters verified evidence from two independent sources.