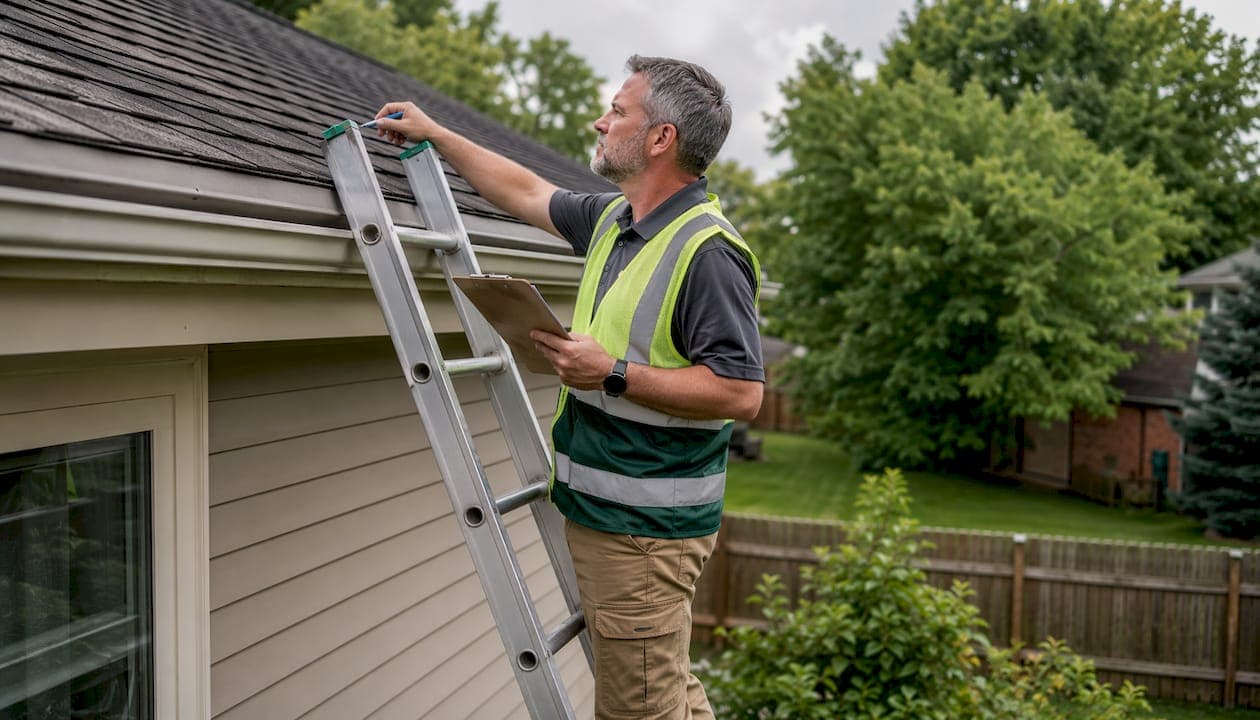
When an insurance adjuster arrives at your home, they are looking for specific, documented evidence — not general impressions. Understanding how insurance adjusters assess roof damage before that visit can meaningfully change your claim outcome. Adjusters evaluate visible storm signatures, functional damage to shingles and penetrations, collateral soft-metal dents on gutters and AC units, overall roof condition, and cause-of-loss patterns that distinguish a storm event from normal aging.
Here is what you will see during a standard inspection:
- Ground walk: The adjuster circles the perimeter checking gutters, AC fins, window screens, and other soft metals for dents that corroborate hail size and storm severity.
- Roof surface check: On-roof zone-by-zone inspection for hail impacts, granule loss, wind-lifted tabs, and missing shingles.
- Test squares: A 10'x10' (100 sq ft) area marked with chalk or spray paint where the adjuster counts and records qualifying functional hits.
- Penetrations and flashings: Vents, pipe boots, chimney counter-flashing, and ridge caps are checked for dents and displacement.
- Attic and interior check: Wet insulation, ceiling stains, and daylight visible through decking are documented.
- Photos and estimate: Annotated close-ups, full-elevation shots, and a written scope of loss built in Xactimate.
The single most important action you can take is to document the storm event immediately: timestamped photos of all four elevations, soft-metal dents, and any interior water marks. Do this before any mitigation work begins.
Pro Tip: Have a qualified roofing contractor on-site during the adjuster visit. A contractor who knows functional-damage standards can point out hits the adjuster might classify as cosmetic and document any findings the adjuster does not include in the written report.
Table of Contents
- What adjusters look for on your roof: a damage checklist
- How adjusters actually inspect your roof, step by step
- How adjusters decide whether damage is storm-related or just aging
- How inspection findings affect repair versus replacement and what you get paid
- Dos and don'ts when meeting the adjuster
- What to expect for timing: inspection duration and claim timeline
- Common reasons claims get reduced or denied
- Why an independent 21-point inspection strengthens your claim
- Key Takeaways
- What a storm-damage inspection actually looks like from our side
- Chattanoogaroofrepairs is ready to document your roof before the adjuster arrives
- Useful sources and references
What adjusters look for on your roof: a damage checklist
The insurance claim roof assessment follows a consistent pattern. Knowing the checklist lets you document the same evidence before the adjuster arrives.
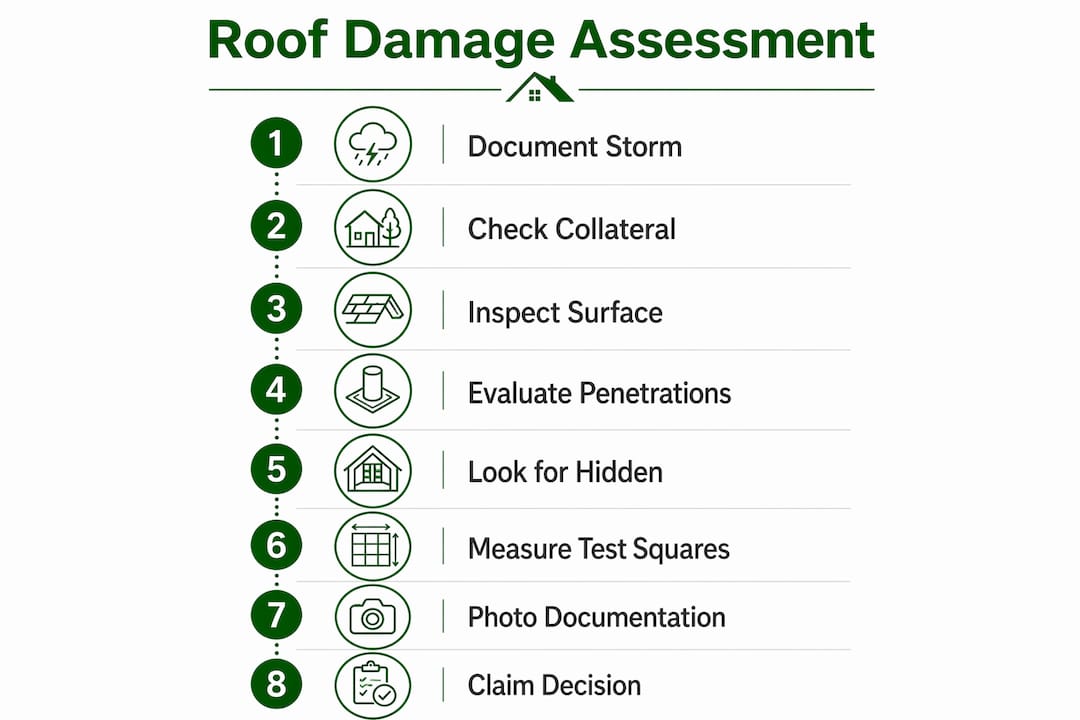
Ground-level indicators
Collateral soft-metal dents are the adjuster's first stop because they provide objective, unambiguous proof of hail size and storm severity. Dented gutters, flattened AC fins, bent window screens, and dings on metal fencing all correlate directly with roof findings. If the adjuster finds no dents on soft metals, they are more likely to attribute roof granule loss to aging rather than impact.
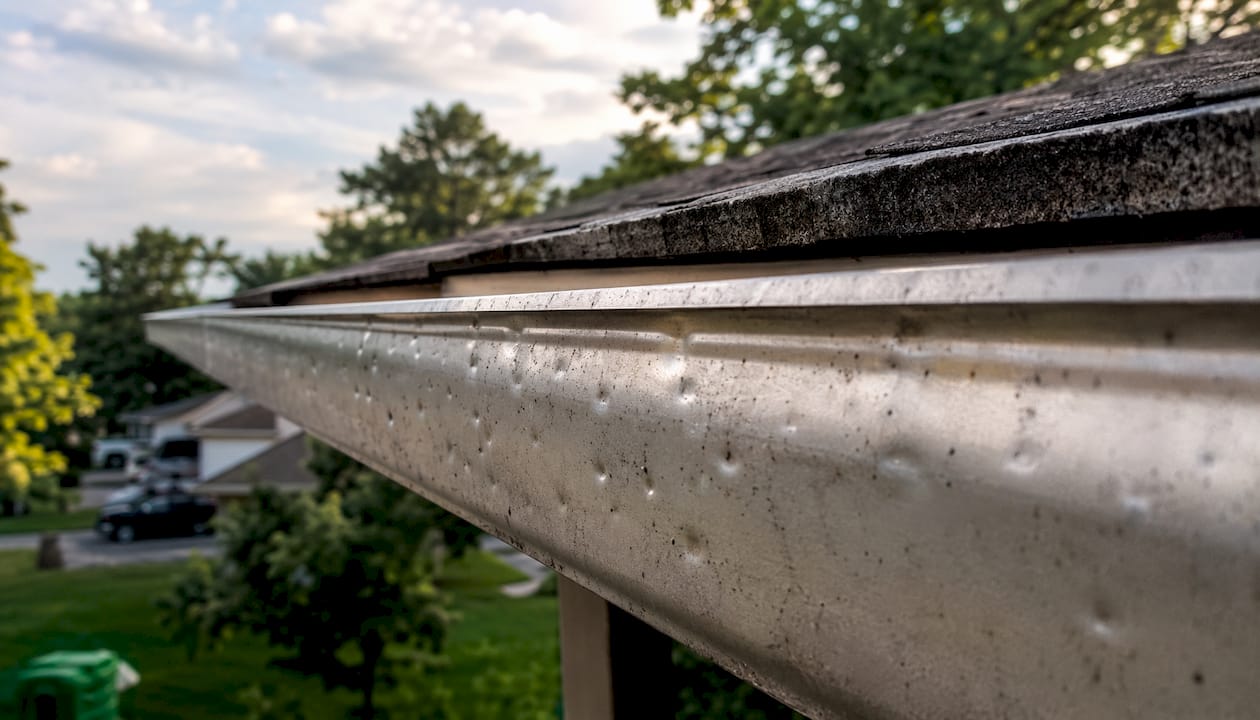
Roof surface indicators
Hail damage appears as random circular marks with dark centers where granules are displaced and the underlying mat is exposed. Quarter-sized hail, roughly one inch in diameter, is the common threshold at which asphalt shingles begin to sustain functional damage rather than purely cosmetic granule loss. Wind damage shows differently: torn adhesive strips, lifted tab edges, missing shingles, and concentrated damage along ridges and rakes.
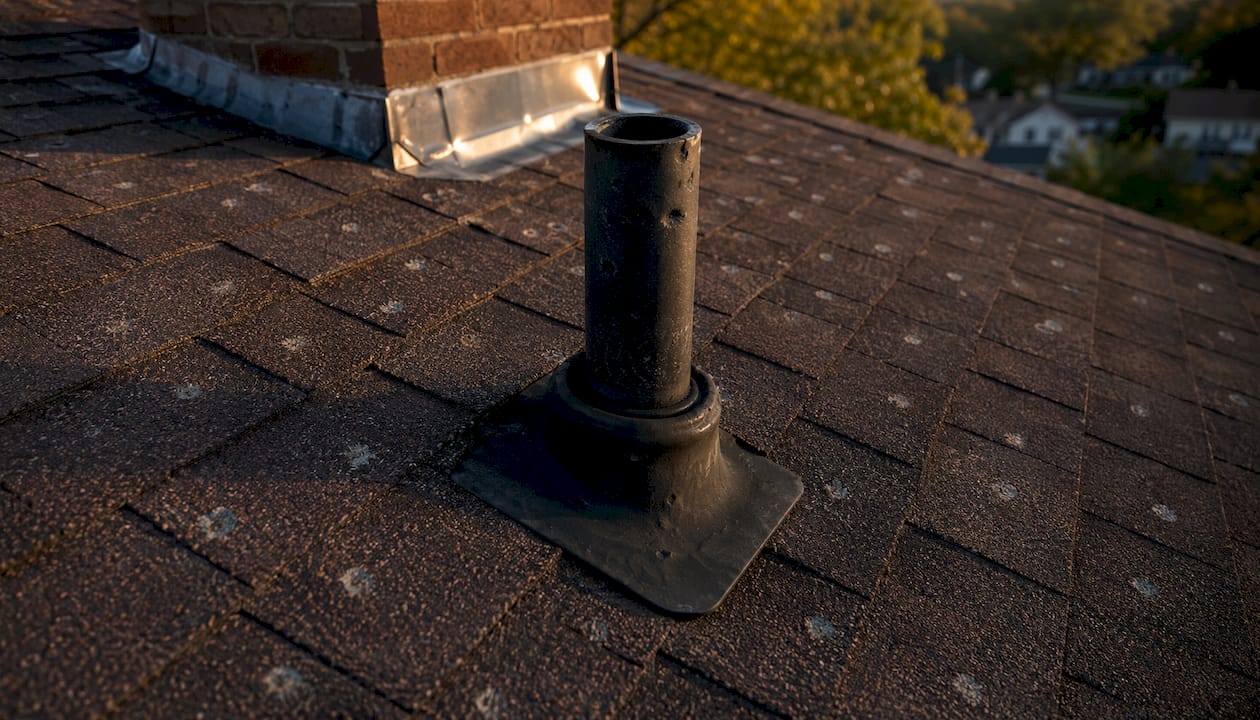
Penetrations and flashings
Pipe boots, ridge vents, turbines, and chimney counter-flashing are all soft enough to show hail dents clearly. Displaced or cracked flashing at valleys and wall intersections is documented as a separate line item in the adjuster's scope.
Structural and hidden signs
Inside the attic, adjusters or contractors look for wet insulation, ceiling stains, visible daylight through the decking, and any evidence of decking rot. These findings support a broader scope of loss and can push a repair toward a full replacement.
Test squares and functional hit thresholds
| Measurement | Standard |
|---|---|
| Test square size | 10 ft x 10 ft (100 sq ft) |
| Typical carrier threshold | 6–10 functional hits per test square |
| Hit type counted | Functional (bruising, mat exposure) — not cosmetic granule scuff |
| Marking method | Chalk or spray paint; shingles hand-manipulated to feel for bruising |
| Slopes tested | Multiple slopes, especially those facing the storm direction |
Photo documentation
Adjusters expect full-elevation context shots from the ground, annotated test-square close-ups with a scale reference, attic photos showing any moisture evidence, and timestamped images tied to the storm date. Documenting all four elevations from the ground is a baseline requirement for a defensible storm damage claim.
Pro Tip: Place a coin or ruler next to each impact mark in your close-up photos. Scale references make hit size indisputable when the adjuster reviews your documentation.
How adjusters actually inspect your roof, step by step
The roof damage inspection process follows a predictable sequence. Knowing each step helps you cooperate without accidentally compromising your evidence.
- Perimeter ground walk. The adjuster photographs all four elevations and examines soft metals at ground level before climbing. This sets the baseline for storm-severity corroboration.
- Exterior elevation photos. Wide-angle shots of each roof face are taken from the ground to establish slope orientation, visible damage distribution, and overall condition.
- Ladder setup and roof access. The adjuster climbs to the roof and begins a zone-by-zone walk, typically starting at the lowest slope and working toward the ridge.
- Test square placement. Using chalk or spray paint, the adjuster marks one or more 10'x10' squares per slope, then hand-manipulates shingles inside each square to feel for bruising and counts qualifying functional hits.
- Penetration and flashing check. Every vent, pipe boot, skylight curb, and flashing termination is examined for dents, displacement, or cracking.
- Measurements and material documentation. Per field reporting requirements, adjusters record roof type, age, pitch, slope area, and number of layers. When available, aerial CAD diagrams from EagleView are used; otherwise, manual measurements are taken.
- Attic and interior check. The adjuster or a contractor representative enters the attic to look for moisture intrusion, staining, daylight, and decking condition.
- Photo documentation. Annotated close-ups of each test square, penetration findings, and any interior evidence are captured with timestamps.
- Scope of loss and Xactimate estimate. All findings are compiled into a written report with line-item pricing. Xactimate and EagleView are the standard tools for estimate generation and CAD measurement.
- Homeowner walkthrough. A professional adjuster will briefly review findings with you before leaving. This is your opportunity to ask questions and note any items you believe were missed.
A non-complex single-layer residential roof inspection typically takes 45–90 minutes on-site. Multi-layer or complex roofs with multiple penetrations can run two hours or more.
How adjusters decide whether damage is storm-related or just aging
Cause-of-loss attribution is where many claims are won or lost. The adjuster's decision here determines whether your carrier covers the damage or denies it as normal wear and tear.
Storm damage is uneven and directional. Hail hits appear randomly across a slope, concentrated based on storm trajectory. Wind damage clusters at ridges, rakes, and leading edges. Aging, by contrast, is uniform: consistent granule erosion across all slopes, curling or cupping tabs, and brittle shingles that crack under light pressure. An adjuster trained in pattern recognition can usually distinguish the two within the first test square.
Collateral evidence is the most powerful tool for storm attribution. When the adjuster finds dented gutters, flattened AC fins, and dings on metal fencing, those findings make it very difficult to attribute roof granule loss to aging alone. Adjusters regularly attribute ambiguous granule loss to aging when soft-metal corroboration is absent, so photographing every dented surface on your property immediately after a storm is critical.
Roof age and maintenance history also factor in. An older roof with documented prior repairs creates a more complex attribution picture. Carriers may argue that pre-existing wear contributed to the damage, reducing the scope of coverage. Maintenance records, prior inspection reports, and photos taken before the storm all help counter that argument.
When an adjuster attributes damage to wear and tear rather than a storm event, the carrier typically denies coverage for that scope. If storm evidence is present but undocumented, the homeowner has little recourse after the report is filed. The adjuster's written report is the functional claim record: items excluded from it are rarely covered later.
When writing your own damage descriptions to pair with photos, keep them objective and specific. "Random circular granule loss with exposed mat, consistent with hail impacts observed on [storm date]" is far more defensible than "shingles look bad." Reference the storm date and time, and note any weather service records that confirm the event.
How inspection findings affect repair versus replacement and what you get paid
The outcome of the roof damage inspection process directly determines whether your carrier authorizes a repair, a partial replacement, or a full replacement, and how much you receive.
Repair vs. replacement thresholds
Carriers use the concentration of functional hits per test square, overall roof age, and a reparability test to make this call. If the adjuster finds fewer than the carrier's threshold of functional hits per square, a repair is typically authorized. When hit counts exceed the threshold across multiple slopes, or when the shingles are too brittle to accept new fasteners without cracking, replacement is the more likely outcome.
The adjuster's scope of loss is not the final word. Independent contractor reports with annotated photos and their own test-square counts can trigger a re-inspection and a revised estimate. Supplements submitted with defensible documentation are a standard part of the claims process.
How your payout is calculated
Replacement Cost Value (RCV): The full cost to replace the damaged material with like kind and quality, without deducting for depreciation. Most standard homeowner policies pay RCV, but the carrier typically releases the full amount in two stages.
Actual Cash Value (ACV): RCV minus depreciation based on the roof's age and condition. If your policy is ACV-only, this is your ceiling.
Recoverable depreciation: The withheld portion of an RCV policy, released after the work is completed and documented. Your deductible is subtracted from the initial payment.
Supplements: Additional line items submitted after the initial estimate, typically when a contractor finds hidden damage or scope items the adjuster missed. A well-documented independent inspection report is the most effective tool for supporting a supplement.
Claim glossary
| Term | What it means |
|---|---|
| Scope of loss | The written list of all damaged items and required repairs |
| Line item | A single repair task with its own unit price in Xactimate |
| Endorsement | A policy add-on that modifies standard coverage terms |
| Supplement | Additional scope submitted after the initial estimate |
| Recoverable depreciation | Withheld RCV funds released after repair completion |
Dos and don'ts when meeting the adjuster
Your behavior before, during, and after the adjuster visit has a direct effect on your claim outcome.
Do:
- Photograph all four elevations, gutters, AC units, and any interior water marks immediately after the storm, before any mitigation work.
- Document storm damage photos with timestamps and tie them to the storm date using weather service records.
- Secure the property with emergency tarping if needed, but photograph everything first.
- Schedule a contractor inspection before the adjuster visit so you have an independent report in hand.
- Have a qualified roofing contractor present during the adjuster visit to identify functional damage and note any items the adjuster does not document.
- Bring your claim number, policy number, prior maintenance records, and a copy of the contractor's report to the adjuster meeting.
- Clear a safe access path to the roof and attic for the adjuster.
Don't:
- Sign away assignment of benefits or any rights before you understand what you are agreeing to.
- Accept a verbal "no damage" conclusion without requesting the adjuster's written findings and annotated photos.
- Allow emergency repairs or tarping before photographing the damage in its original condition.
- Guess at storm dates or overstate damage. Inaccurate statements can undermine an otherwise valid claim.
- Volunteer information about preexisting conditions or roof age beyond what the adjuster directly asks.
- Assume the adjuster's scope is complete. Review it carefully and compare it to your contractor's independent report.
What to expect for timing: inspection duration and claim timeline
Setting realistic expectations for the process helps you stay organized and avoid delays.
A standard residential roof inspection typically takes between a short to moderate amount of time for a single-story home with a straightforward shingle roof, while larger homes, multi-layer roofs, or properties with complex penetration layouts can require more time for the on-site visit. After the inspection, the adjuster typically submits their estimate to the carrier within a few days to a week.
The broader claim timeline generally follows this sequence:
- Initial inspection by the carrier's adjuster.
- Adjuster estimate submission to the carrier, usually within a few business days.
- Carrier review and initial payment (ACV or first RCV installment), typically within one to three weeks of the inspection for straightforward claims.
- Contractor supplement submission if additional scope is identified during repair.
- Re-inspection by the carrier if a supplement is disputed or if new damage is found.
- Recoverable depreciation release after the completed work is documented and submitted.
The biggest bottleneck in most claims is incomplete documentation at the initial inspection stage. Homeowners who arrive with timestamped photos, a contractor's independent report, and clear storm-date references consistently move through the process faster than those who rely solely on the adjuster's findings.
Common reasons claims get reduced or denied
Most claim denials follow a predictable pattern. Knowing them in advance lets you close those gaps before the adjuster arrives.
- Pre-existing damage or advanced age. If the adjuster determines that the roof's condition was already compromised before the storm, the carrier may deny the claim or reduce the scope significantly. Counter this with maintenance records, prior inspection reports, and collateral soft-metal evidence that ties the damage to a specific storm event.
- Insufficient documentation. Missing timestamps, no close-up photos with scale, or a contractor report that only highlights damage without documenting undamaged zones all weaken a claim. Pre-mitigation documentation — photos and drone mosaics taken before any tarping or repairs — is the non-negotiable first step.
- Attribution errors. When storm evidence is present but not documented, adjusters may assign granule loss to aging. Dented gutters, AC fins, and window screens are your strongest rebuttal. Photograph every soft-metal surface on the property immediately after the storm.
- Improper mitigation before documentation. Tarping or patching before photographing the damage in its original state is one of the most common reasons claims are weakened. Always photograph first, then protect.
- Incomplete adjuster report. Items excluded from the adjuster's written report are rarely covered later. Review the scope carefully and compare it line by line against your contractor's independent findings.
Pro Tip: Request that the adjuster provide annotated photos of every test square, including zones where no damage was found. A report that documents both damaged and undamaged zones is significantly more defensible than one that only lists damage.
Why an independent 21-point inspection strengthens your claim
A professional inspection report does more than confirm damage. It provides the structured, carrier-ready evidence that makes negotiation objective rather than subjective.
A thorough 21-point inspection covers the full roofing system zone by zone: full-elevation photos from the ground, roof-level findings for each slope, test-square counts with annotated close-ups, penetration and flashing condition, attic and decking checks, and negative findings documented by zone. That last element matters more than most homeowners realize. A report that documents zones with "no damage observed" is considered significantly more credible by carriers than one that only highlights damage areas.
| Report element | Why it matters to the carrier |
|---|---|
| Full-elevation photos | Establishes overall condition and storm-direction context |
| Test-square counts with annotations | Provides the functional hit data carriers use for repair/replace decisions |
| Penetration and flashing findings | Documents scope items adjusters sometimes miss |
| Attic and decking check | Supports hidden damage claims and broader scope |
| Negative findings by zone | Demonstrates objectivity and increases report credibility |
| Drone mosaic or ladder-level photos with scale | Makes hit size and distribution indisputable |
Independent contractor reports also provide a second set of measurements. Aerial imagery providers like EagleView are commonly used to create CAD roof diagrams for Xactimate estimates, but discrepancies between aerial measurements and on-site reality do occur. A contractor who manually measures the roof and documents any discrepancy gives you grounds to request a re-measure if the carrier's estimate is based on incorrect square footage.
Practically, independent reports increase supplement success, provide the evidence base for re-inspections, and give you a defensible position if the claim goes to appraisal or dispute.
Pro Tip: Request time-stamped drone mosaics or ladder-level photos with a ruler or scale card in frame. When hit size and distribution are visually indisputable, carriers have far less room to reclassify functional damage as cosmetic.
Key Takeaways
Insurance adjusters assess roof damage through a structured process of collateral evidence, test squares, pattern recognition, and documented scope, and your independent documentation is the most reliable way to protect a fair outcome.
| Point | Details |
|---|---|
| Collateral evidence is decisive | Dented gutters, AC fins, and soft metals corroborate storm attribution when granule loss alone is ambiguous. |
| Test squares drive repair vs. replacement | Adjusters count functional hits in a 10'x10' square; carriers generally have a threshold number of hits per square to authorize replacement. |
| Document before any mitigation | Timestamped photos of all four elevations and soft metals, taken before tarping or repairs, are the foundation of a defensible claim. |
| The adjuster's report is the claim record | Items excluded from the written scope are rarely covered later; an independent contractor report is your best tool for supplements. |
| Chattanoogaroofrepairs provides carrier-ready reports | A 21-point inspection with annotated photos, test-square counts, and negative findings by zone gives homeowners a defensible, professional document for the adjuster meeting. |
What a storm-damage inspection actually looks like from our side
Most homeowners assume the adjuster's report tells the whole story. It often does not. What gets left out of that report is frequently what costs you the most.
When we arrive at a property after a storm, the first priority is always documentation before anything else is touched. That means a full perimeter walk to photograph gutters, AC units, and any soft-metal surfaces, followed by a drone mosaic when conditions allow, and then a zone-by-zone roof inspection with annotated close-ups at each test square. We mark functional hits the same way adjusters do, using chalk and physical manipulation to distinguish bruising from cosmetic scuff. We also document every zone where we find no damage, because a report that only lists damage is the first thing a carrier's desk adjuster will question.
The written scope we produce is built to align with adjuster protocols: test-square counts, collateral evidence, penetration findings, and attic observations all included. When a homeowner brings that report to the adjuster visit, the conversation shifts from "is there damage?" to "how much?" That is a fundamentally better position to be in.
Having a certified contractor on-site during the adjuster visit is not about confrontation. It is about making sure functional damage gets documented in the adjuster's report the first time, so you are not chasing supplements for months.
Chattanoogaroofrepairs is ready to document your roof before the adjuster arrives
When your roof has storm damage, the window between the event and the adjuster visit is the most important time to act. Chattanoogaroofrepairs provides free roof inspections and carrier-ready reports built around the same protocols adjusters use: full-elevation photos, annotated test-square counts, penetration and flashing findings, attic checks, and negative findings documented by zone. If your roof is actively leaking, we offer same-day emergency tarping to protect your home while preserving the pre-mitigation documentation your claim depends on.
Our 21-point inspection report is formatted to support supplements, re-inspections, and carrier negotiations. We can be on-site during the adjuster visit to point out functional damage and ensure nothing is left off the written scope. Homeowners in Chattanooga and the surrounding area can reach us directly to schedule a free inspection or request emergency tarping. Contact Chattanoogaroofrepairs today and go into your adjuster meeting with the documentation you need.
Useful sources and references
The following resources were used to build this guide. Homeowners and contractors can consult them directly to verify thresholds, measurement protocols, and best practices.
- TWIA & TFPA Property Damage Evaluation Guidelines — Field adjuster reporting requirements, including roof type, age, pitch, number of layers, and measurement protocols.
- InterNACHI: How to Perform Roof Inspections — Standard inspection reporting requirements for roof covering, flashings, drainage, penetrations, and attic evidence.
- NRCIA: Roof Inspection for Insurance Claim — Guidance on independent inspector roles, report content standards, and how certified inspection reports support carrier negotiations.
- Restoration Intel: Roof Damage Assessment and Emergency Tarping Field Protocol — Pre-mitigation documentation requirements and defensible report standards for contractors and homeowners.
- ConsumersWeek: What Roof Claims Adjusters Actually Look For — Test-square method, functional hit thresholds, and hail size benchmarks used in carrier assessments.
- iRoofing: Dos and Don'ts When Meeting With a Roof Adjuster — Practical homeowner guidance for adjuster meetings.
- Chattanoogaroofrepairs: Storm Damage Roof Claim Process — Step-by-step homeowner walkthrough of the claim process from first notice of loss through settlement.
- Chattanoogaroofrepairs: How to Document Storm Roof Damage Photos — Practical guidance on timestamping, photo angles, and assembling a photo package for an insurance claim.
The most defensible claim documentation combines timestamped pre-mitigation photos, collateral soft-metal evidence, and a zone-by-zone contractor report that documents both damaged and undamaged areas. Any one of these elements alone is weaker than all three together.