
Start with this: adopt the 90/60/30/7 + daily updates cadence, assign one named on-site contact, and document every written notice and tenant acknowledgement before the first crew member sets foot on your property. That single discipline separates projects that finish cleanly from ones that generate move-outs, rent concession demands, and negative reviews.

Tenant communication during roof repairs is, as experienced property teams put it, half construction project, half communication project. The construction side is manageable with a competent roofer. The communication side fails when it is treated as an afterthought.
Here is what to lock in during the first 72 hours after signing a roofing contract:
- Assign your on-site contact. One person, one phone number, posted at every building entrance.
- Confirm the tentative start date with your contractor and block it on your calendar.
- Queue your 90-day heads-up notice using the templates in Section 8 below.
- Create a project folder (physical or digital) labeled by building and date for all notices, acknowledgements, and incident logs.
- Verify contractor insurance and crew hours before any communication goes out to tenants.
Get these five steps done before anything else. Tenants who receive clear, early notice file fewer complaints, and property managers who document every exchange protect themselves if disputes arise later.
Table of Contents
- What are your legal obligations to tenants during roof work?
- How should you schedule and deliver tenant updates on roof work?
- How do you minimize disruption for tenants during roofing projects?
- What safety rules and emergency steps should tenants follow?
- How should you coordinate with your roofing contractor?
- What records should you keep before, during, and after the project?
- Sample templates and checklists you can use right now
- Key Takeaways
- The part most landlords underestimate about roofing projects
- Chattanoogaroofrepairs makes occupied roofing projects manageable
- Useful sources and further reading
What are your legal obligations to tenants during roof work?
Roof repairs do not suspend tenant rights. Your core obligations remain in place throughout the project: maintain habitable conditions, provide required written notice before entering a unit, and respond promptly to any emergency condition the work creates.
Providing reasonable written notice before entering a tenant's unit for repairs is a common requirement in many U.S. jurisdictions, including when the primary work is external. If your crew needs attic access, needs to inspect an interior ceiling, or must enter a unit to assess water intrusion, that visit requires written notice delivered in advance and logged with a timestamp.
Habitability is the second guardrail. Roofing work that creates sustained water intrusion, structural exposure, or conditions that make a unit genuinely uninhabitable triggers a different conversation: temporary relocation or a rent adjustment. Most standard roofing projects do not cross that threshold, but a multi-week replacement during a rainy season on an occupied building can. Know your state's habitability standard before work begins, not after a tenant calls an attorney.
State and local landlord-tenant laws vary significantly. Minimum notice periods, quiet-hours rules, and habitability definitions differ by jurisdiction. Check your state's landlord-tenant statute and your municipality's housing code before finalizing your communication plan. The guidance in this article is operational, not legal advice — confirm current rules with a qualified attorney or your local housing authority.
Pro Tip: Keep a delivery log for every notice. A signed acknowledgement or a certified-mail receipt is worth far more than a phone call if a tenant later claims they were never informed. Written records are your evidence.
Recordkeeping and legal compliance are two sides of the same coin. Every notice you send, every acknowledgement you receive, and every incident you document creates the paper trail that protects both you and your tenants if questions arise after the project closes.
How should you schedule and deliver tenant updates on roof work?
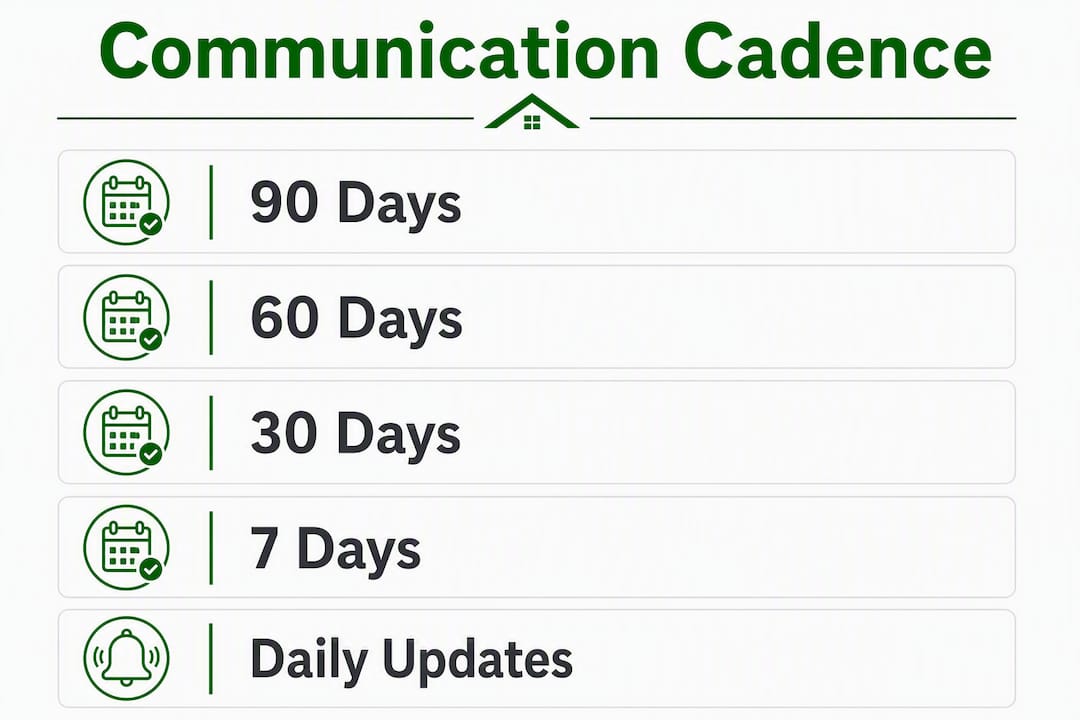
A staged notice schedule with multiple updates before and during roofing projects is a reliable approach for multi-family and single-family occupied properties. Each stage has a specific objective, and every notice answers four questions in its first paragraph: What is happening, When it starts and ends, Who to call with questions, and What the day-of impact will be.
The five-stage notice schedule
- Day -90 (Heads-up notice): Announce the project is coming. Keep it brief. State the approximate start window, the general scope (repair vs. full replacement), and your contact name and number. No technical details needed at this stage.
- Day -60 (Schedule and impact preview): Share the confirmed start date, projected duration, affected building sections, expected noise windows, and any parking changes. This is the notice tenants will reference most.
- Day -30 (Final logistics): Confirm the start date, provide the contractor's crew hours, describe dumpster and material staging locations, and include the on-site contact card. Attach a parking map if spaces will be restricted.
- Day -7 (Reminder + contact card): A short reminder with the start date, the on-site contact's name and cell number, and a one-sentence summary of what tenants should do on Day 1 (e.g., move vehicles by 7 AM, secure pets indoors).
- Day 0 through completion (Daily 5 PM updates): One paragraph, three sentences or fewer: what was completed today, what is planned tomorrow, and any schedule change or weather note. Delivered by text blast and posted on the building entrance.
Which channels to use and when
| Notice Stage | Mailed Letter | Door Hanger | Text Blast | Posted Signage | |
|---|---|---|---|---|---|
| Day -90 | ✓ | ✓ | |||
| Day -60 | ✓ | ✓ | ✓ | ||
| Day -30 | ✓ | ✓ | ✓ | ✓ | |
| Day -7 | ✓ | ✓ | ✓ | ||
| Daily updates | ✓ | ✓ |
Redundancy is the point. A tenant who misses the email catches the door hanger. A tenant who ignores the text sees the lobby sign. Use at least two channels for every notice stage, and always include a QR code on physical postings that links to a digital version of the notice or a time-stamped reporting form.
Pro Tip: Weather contingency language belongs in the Day -30 notice: "Work may be rescheduled due to rain. You will receive a text update by 6 AM on any day work is delayed."
How do you minimize disruption for tenants during roofing projects?
Tenants respond to practical impacts, not technical specs. Your notices should focus on what tenants will actually experience: noise windows, parking restrictions, balcony access changes, and any odor from adhesives or sealants. A notice that explains membrane installation sequences tells tenants nothing useful. A notice that says "loud nail-gun work from 8–11 AM on Tuesday and Wednesday" gives them something they can plan around.
Logistics to plan and communicate before Day 1:
- Parking map: Mark which spaces are off-limits, when restrictions start, and where tenants should park instead. Post this at every entrance and include it in the Day -30 notice.
- Dumpster and material staging: Specify where the dumpster will sit and for how long. Tenants with ground-floor units near staging areas need extra notice.
- Crew hours: State the earliest start time and the latest end time. Typical start and end times for residential and multi-family roofing projects occur during daytime business hours; confirm these hours with your contractor and communicate them to tenants.
- Quiet days: If the project includes phases with minimal noise (underlayment inspection, final walkthrough), flag those days so tenants know relief is coming.
- Pet guidance: Advise tenants to keep pets indoors during active work hours. Nail guns and unfamiliar workers on the roof create stress for animals, and a loose pet near a staging area is a liability.
Visible end-of-day cleanup matters as much as any written notice. Property teams consistently report that tenants judge a contractor by site condition at 6 PM. A magnet sweep for nails, swept breezeways, and a tarped dumpster signal professionalism without a single word. That daily visual reassurance reduces escalation calls the next morning.
For edge cases where disruption is genuinely severe (a week of 7 AM nail-gun work directly above a home-office tenant, for example), a modest rent credit or a coffee-shop stipend for a few days is far cheaper than a move-out. Learn how commercial roof repairs can be phased to minimize tenant disruption when staging options exist.
What safety rules and emergency steps should tenants follow?
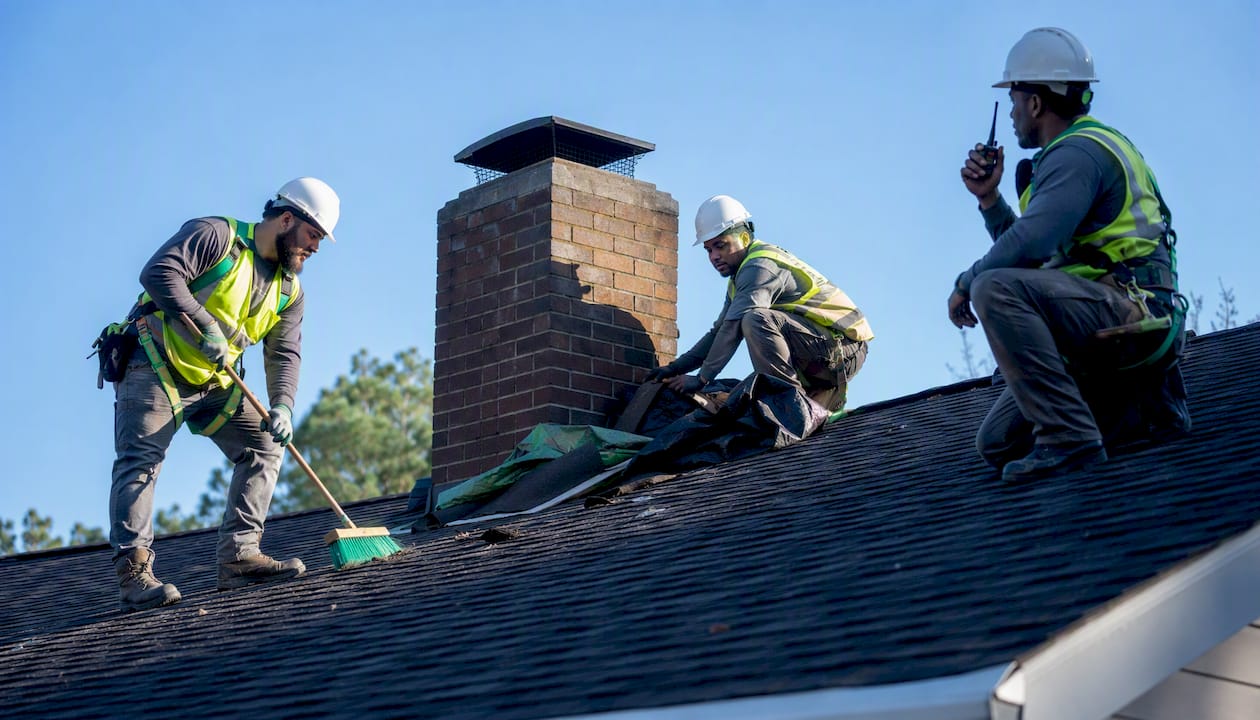
Safety communication needs to be short, plain, and posted where tenants will actually read it. The goal is three things: keep tenants out of exclusion zones, give them a clear reporting path, and make sure your team can respond within one hour of any incident.
Tenant-facing safety instructions (post at every entrance)
- Stay out of marked exclusion zones. Rope barriers and cones mark areas where falling debris is a risk. Do not walk under active work areas.
- Keep pets secured indoors during all work hours. No exceptions during active roofing days.
- If you find nails or debris in a walkway, parking area, or your unit, call the on-site contact immediately. Do not wait until the next day.
- If you see a water leak or ceiling damage during work, call the on-site contact and take a photo with a timestamp.
- In a genuine emergency (structural damage, active water intrusion into a unit, injury on site), call 911 first, then the on-site contact.
Incident response workflow
- Tenant reports an issue to the on-site contact by phone, text, or QR-code form.
- On-site contact responds within 1 hour, assesses the situation, and either resolves it or escalates to the property manager.
- Property manager documents the report, the response, and the resolution in the project log with photos and timestamps.
- Follow-up notice to the affected tenant within 24 hours confirming the fix.
When an incident rises to the level of active water intrusion into a unit, structural exposure, or an injury, treat it as an emergency requiring immediate repair and, if the unit is uninhabitable, temporary relocation. Emergency tarping can stabilize a situation quickly while a permanent repair is scheduled.
Roughly 90% of tenant complaints during roofing projects are related to five common issues: noise, parking issues, unclear schedules, lack of daily updates, and ignored minor concerns. Prepare a brief response script for each before work starts, and your on-site contact can defuse most calls in under two minutes.
How should you coordinate with your roofing contractor?
Clear role separation prevents mixed messages. The property manager owns the tenant relationship, billing decisions, and written communications. The roofing contractor's project lead owns daily on-site operations, crew scheduling, and on-site problem-solving. Tenants should never have to guess who to call.
Pre-work deliverables to require from your contractor
| Deliverable | Why It Matters |
|---|---|
| Signed project schedule with crew hours | Sets the published noise and parking windows |
| Equipment and material staging plan | Lets you draft accurate parking maps and dumpster notices |
| Magnet-sweep and end-of-day cleanup plan | Confirms nail removal and breezeway standards |
| Proof of liability insurance and workers' comp | Required before any tenant-facing communication goes out |
| On-site contact card (name, cell, photo) | Posted at building entrances for tenant access |
| Weather contingency protocol | Defines how and when delay notices will be sent |
The site manager model is the single most effective escalation-prevention tool available. One named, identified individual on site during work hours handles tenant questions directly. Routing calls through the office or through multiple people creates delays and contradictory answers. Ask your contractor during the bid stage: "Who is the named on-site contact, and what is their cell number?" If they cannot answer that question, that is useful information.
Pro Tip: Ask contractors these four questions before awarding the contract: Who sends the daily 5 PM update? What is your magnet-sweep standard? How do you handle a weather delay notification? Who is the on-site contact for tenant questions? A contractor who answers all four clearly is prepared for occupied-property work.
The 5 PM daily update is a shared responsibility. The contractor's project lead provides the day's progress summary; the property manager sends it to tenants via text blast and posts it at building entrances. That handoff should be agreed in writing before Day 1.
What records should you keep before, during, and after the project?
Written records for every exchange are the standard. Phone calls are not. A tenant who later claims they received no notice, or that a repair was never completed, cannot be countered with "I called them" — but they can be countered with a certified-mail receipt, a text-blast log, or a time-stamped QR-report entry.
Four records every project must have:
- Initial notice copies: Dated copies of every notice sent, with the delivery method noted (mailed, emailed, door-hanger, posted).
- Signed acknowledgements or delivery log: Tenant signatures where obtainable, or a certified-mail receipt, or a text-blast platform's delivery confirmation.
- Daily incident log with photos: Every reported issue, the response time, the fix, and a follow-up confirmation. Photos with timestamps are the most defensible format.
- Final completion and walkthrough report: A written record that work is complete, the site has been cleaned, and any outstanding tenant concerns have been addressed.
A QR-code reporting route that creates time-stamped photo submissions is worth setting up for any project longer than one week. It lowers the barrier for tenants to report issues, captures photos automatically, and produces a single record per ticket without requiring an app download.
File everything by building, then by date. A simple folder structure (Building A > 2026 Roof Project > Notices / Incidents / Completion) lets you find any record in under two minutes. Keep the project file open for 30–90 days after completion to handle follow-up tenant questions about lingering issues or warranty claims.
Pro Tip: Use your roof repair documentation system to track tenant repair requests from the first notice through final sign-off. A single system beats scattered emails and sticky notes every time.
Sample templates and checklists you can use right now
Every notice should answer What, When, Who, and Impact in the first paragraph. Tenants scanning a notice in 10 seconds should get all four answers without reading past the opening lines.
Ready-to-use notice templates
| Notice | First-Paragraph Template |
|---|---|
| Day -90 heads-up | "We are planning a roof [repair/replacement] at [Property Name] beginning approximately [Month, Year]. Work will take roughly [X weeks]. More details to follow. Questions? Call [Name] at [Phone]." |
| Day -60 schedule | "Roof work begins [Date] and is expected to finish by [Date]. Work hours are [7 AM–5 PM]. Expect noise during [specific phases]. Parking in [Lot/Spaces] will be restricted. Contact: [Name, Phone]." |
| Day -30 logistics | "Final reminder: roof work starts [Date]. Crew arrives by [Time]. Dumpster located at [Location]. Move vehicles from [Spaces] by [Time] on Day 1. On-site contact: [Name, Cell]. Weather delays will be texted by 6 AM." |
| Day -7 reminder | "Roof work begins [Day, Date]. Please move your vehicle from [Spaces] by [Time]. Keep pets indoors during work hours. Questions? Text or call [Name] at [Cell]." |
| Daily 5 PM update | "Today: [What was completed]. Tomorrow: [What is planned]. [Any weather note or schedule change]. Questions? Call [Name] at [Cell]." |
Day-of building entrance signage
Post this at every entrance on Day 1 and update the date each morning:
ROOF WORK IN PROGRESS Date: [Date] | Hours: 7 AM – 5 PM Exclusion zones are marked with cones and rope. Please stay clear. Pets must be kept indoors during work hours. Found nails or debris? Call [Name] at [Cell] immediately. Daily updates posted here each evening by 5 PM.
Pre-work checklist (property manager + contractor)
- Contractor insurance and workers' comp verified
- Signed project schedule with crew hours received
- Staging and dumpster placement confirmed
- Parking map drafted and approved
- On-site contact card printed and posted
- 90/60/30/7 notices queued and ready to send
- QR-code reporting link or phone number posted at entrances
- Weather contingency language included in Day -30 notice
Tenant incident-response checklist
- Tenant report received and logged with timestamp
- On-site contact notified within 15 minutes
- Site assessment completed within 1 hour
- Fix or escalation decision documented
- Follow-up notice sent to tenant within 24 hours
- Photo and written record filed in project folder
Pro Tip: Keep a running log of all tenant repair requests in one place. When a tenant calls with a follow-up question two weeks after the project closes, you will have the answer in seconds.
Key Takeaways
Effective tenant communication during roof repairs requires a structured notice cadence, a single named on-site contact, and written documentation of every exchange from Day -90 through project close.
| Point | Details |
|---|---|
| Use the 90/60/30/7 cadence | Send five staged notices covering heads-up, schedule, logistics, reminder, and daily updates. |
| Name one on-site contact | A single identified person on site during work hours prevents mixed messages and defuses complaints fast. |
| Document everything in writing | Signed acknowledgements, text-blast logs, and timestamped photos are your evidence if disputes arise. |
| Focus notices on tenant impacts | Lead with noise windows, parking changes, and crew hours — not technical roofing details. |
| Chattanoogaroofrepairs supports occupied projects | Their roofing services include on-site project leads, emergency tarping, and post-project walkthroughs for landlords and property managers. |
The part most landlords underestimate about roofing projects
Most property managers spend weeks vetting contractors on price and materials, then send a single email to tenants the week before work starts. That sequence is backwards.
Construction rarely fails when you hire a competent roofer. What fails is the 30-day window before the first nail goes in, when tenants are left guessing about noise, parking, and whether their unit will be affected. That silence breeds anxiety, and anxious tenants call the office, post reviews, and start looking at competing properties.
The 90/60/30/7 playbook is not about being nice. It is about protecting your asset. Poor tenant communications cause move-out spikes, rent concession demands, and negative online reviews that cost far more than the time it takes to send five well-written notices. A three-week roofing project handled with clear communication stays a three-week project. The same project handled with silence can generate months of follow-up: vacancy, reputation repair, and tenant disputes.
The other piece most landlords miss is the contractor's role in communication. A roofer who cannot name their on-site contact during the bid conversation is not ready for occupied-property work. The daily 5 PM update, the magnet sweep, the posted signage — these are not extras. They are the standard for any project where people are living in the building.
Half the job is communication. The rest is construction.
Chattanoogaroofrepairs makes occupied roofing projects manageable
When you are managing an occupied property and need a contractor who understands the tenant side of the job, Chattanoogaroofrepairs delivers exactly that. Their roofing services in Chattanooga cover roof repair, full replacement, emergency tarping, and post-project walkthroughs — all structured to support the 90/60/30/7 communication playbook you just read.
Their team provides a named on-site project lead, same-day tarping for storm damage, and a 21-point inspection before and after any major project. That means you get the documentation, the site management, and the cleanup standard that keeps tenants informed and complaints low. Transparent pricing and no-pressure estimates mean you know what you are committing to before a single notice goes out.
If you manage properties in the Chattanooga area and have a roof repair or replacement coming up, request a free inspection and get a project plan you can actually hand to your tenants.
Useful sources and further reading
These resources support the guidance in this guide. Use them to verify local rules, download additional templates, or dig deeper into specific operational areas.
- Multi-Family Roof Replacement: Tenant Comms Playbook — The primary source for the 90/60/30/7 cadence, the site manager model, and the five-complaint escalation framework. Start here for templates and operational standards.
- Apartment Roof Replacement Tenant Notice Guide — Practical guidance on plain-English notice writing focused on tenant-visible impacts rather than technical specs.
- Coordinating Roof Repairs with Tenant Notifications — Covers daily update best practices and the single-contact model for reducing escalation.
- Improve Tenant Repair Communication: A Landlord's Guide — Detailed recordkeeping advice, including QR-code reporting and written-record standards. Note: this guide is UK-based; apply its operational principles and verify legal specifics against your U.S. state's landlord-tenant statute.
- Tenant Communication During a Multifamily Roof Replacement — Covers the reputational and financial costs of poor communication, including move-out spikes and review damage.
- Best Practices for Communicating Roof Projects Clearly — Useful for condo boards and multi-family managers coordinating with residents and boards simultaneously.
- How to Properly Notify Tenants About Roof Replacement — Covers legal compliance basics and written notice requirements for U.S. landlords.
- When Do I Notify Tenants About Maintenance Work? — A concise legal and operational overview of notice timing requirements from a U.S. property management perspective.
- Chattanoogaroofrepairs Services — Local roofing services for occupied properties in Chattanooga and surrounding areas, including repair, replacement, emergency tarping, and inspections.