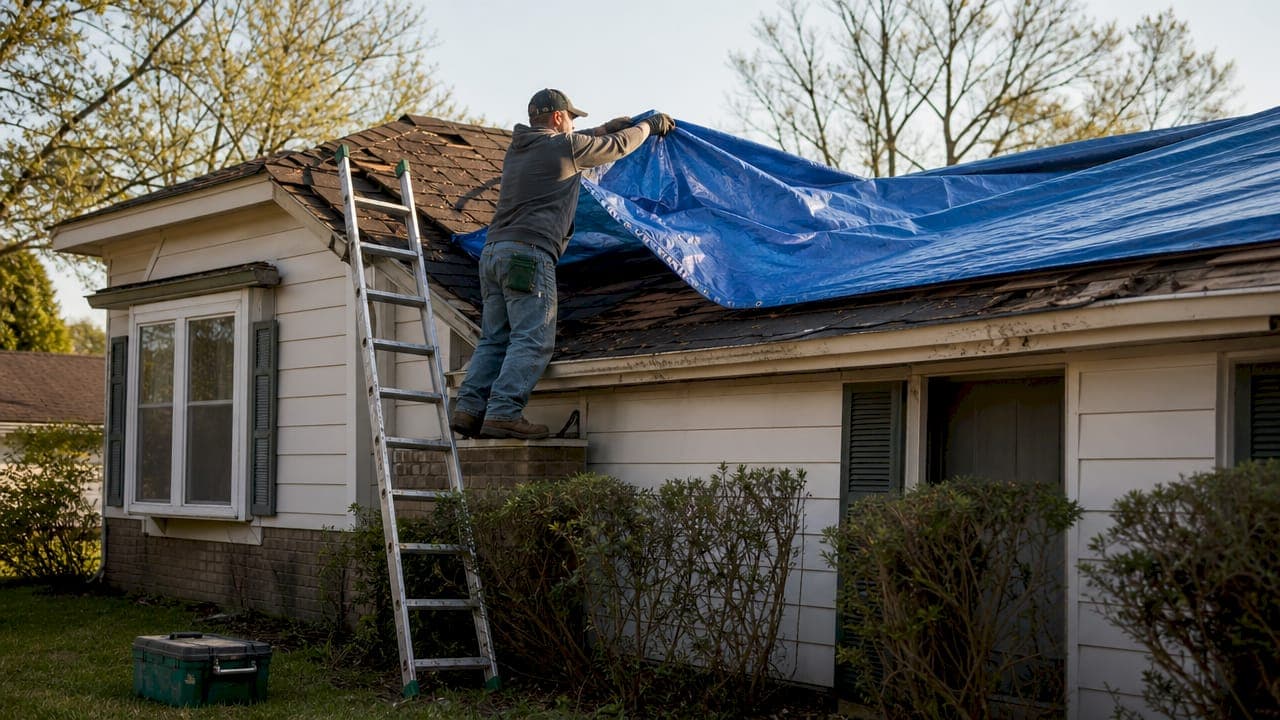
Temporary roof repair options are immediate protective measures that stop water and weather from entering a damaged roof until permanent repairs can be completed. After a storm tears off shingles, cracks flashing, or punches holes through decking, your first job is containment. The right short-term fix, whether a blue polyethylene tarp, professional shrink wrap, roofing cement, or peel-and-stick flashing tape, buys you critical time. It also protects your insurance claim. Choosing the wrong option, or installing it poorly, can make both the damage and the claim worse.
1. What are the most effective temporary roof repair options?
Temporary roof repairs fall into four main categories. Each suits a different damage size, budget, and protection timeline.
Blue polyethylene tarps are the most common DIY solution. Blue tarps last 30–90 days and can handle winds up to 30–45 mph, making them suitable for minor damage under 100 square feet. That wind limit matters. A strong follow-up storm can rip a poorly anchored tarp off entirely, leaving your home exposed again.
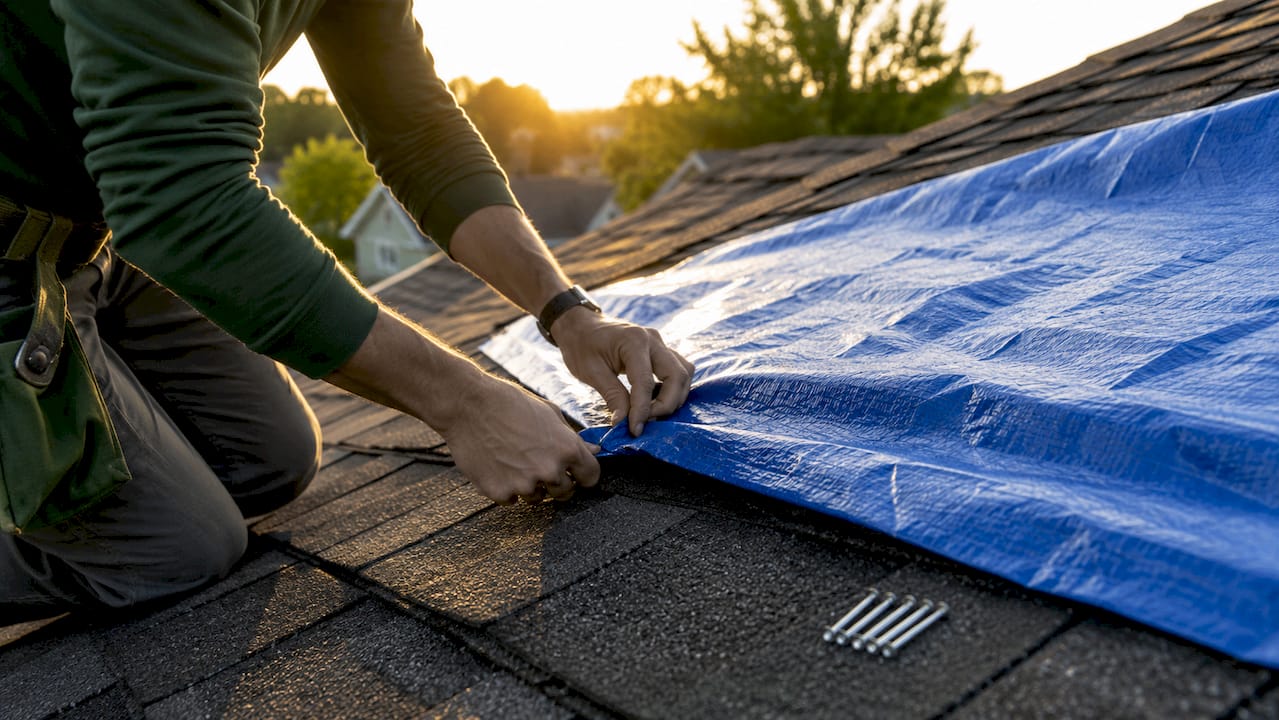
Professional shrink wrap is the strongest temporary option available. Shrink wrap installations last 12–18 months and withstand winds up to 100 mph. Insurance providers favor shrink wrap because it creates a tight, documented seal over large or complex damage areas.
Roofing cement and peel-and-stick flashing tape work best for small, localized problems. Roofing cement seals small holes effectively, while flashing tape handles seams and flashings. Both are short-term measures and require permanent repair later.
Here is a direct comparison of the four main options:
| Option | Lifespan | Wind resistance | Best for | Approx. cost |
|---|---|---|---|---|
| Blue polyethylene tarp | 30–90 days | 30–45 mph | Minor damage, short window | Low (DIY) |
| Professional shrink wrap | 12–18 months | Up to 100 mph | Large or complex damage | Higher (professional) |
| Roofing cement | Weeks | N/A | Small holes, flat areas | Very low |
| Peel-and-stick flashing tape | Weeks to months | N/A | Seams, flashings, edges | Low |
Pro Tip: Choose your temporary fix based on how long you expect to wait for a contractor. If your repair window is longer than 30 days, a blue tarp is not enough. Plan for shrink wrap or a professional tarp system instead.
2. How to safely install a temporary roof tarp
Safe installation starts inside the house, not on the roof. Move belongings, use buckets, and protect electrical systems before you go anywhere near the roof. Water near electrical panels is a serious hazard.
Follow these steps once the interior is secured:
- Assess damage from the ground first. Use binoculars to identify the affected area before climbing. Never step onto a wet or structurally compromised roof surface.
- Choose the right tarp size. The tarp must extend at least 4 feet beyond the damaged area on all sides. An undersized tarp is one of the most common DIY failures.
- Position the tarp over the ridge. Drape it so water runs off rather than pooling. The tarp should cover the peak and extend down both sides when possible.
- Anchor with furring strips, not sandbags. Furring strip anchoring uses wood boards screwed over tarp edges to spread wind load evenly. Sandbags shift and fail in wind events. Point loading with just a few screws causes the tarp to peel up at the edges.
- Overlap in the right direction. Tarp edges should overlap like shingles, with upper layers over lower ones, so water flows away from the opening.
- Work with a helper. Safety guidelines strongly advise against working alone on a damaged roof. A second person on the ground stabilizes the tarp and can call for help if needed.
Pro Tip: Never install a tarp during rain, high winds, or at night. Wait for a dry, calm window even if it means a few hours of delay. A rushed installation that fails causes more damage than waiting.
3. How do insurance considerations affect your repair choices?
Your insurance policy requires you to take reasonable steps to prevent further damage after a storm. Temporary repairs are considered reasonable mitigation, and most policies will reimburse their cost. Skipping temporary repairs entirely can give your insurer grounds to deny a portion of your claim.
Key steps to protect your claim:
- Photograph everything before you touch it. Document the original damage from multiple angles. Careful documentation before and after mitigation preserves claim integrity and guides the repair scope.
- Do not start permanent repairs before the adjuster visits. Temporary fixes are fine and expected. Replacing shingles or decking before inspection can complicate your claim.
- Contact your insurer the same day. Report the damage promptly. Delayed reporting can raise questions about when the damage actually occurred.
- Keep all receipts. Tarp costs, roofing cement, flashing tape, and professional tarping fees are typically reimbursable under your policy's mitigation provisions.
- Use professional shrink wrap for large damage. Insurance providers favor shrink wrap because it creates a documented, engineered seal. It supports your claim rather than complicating it.
Understanding what roofing insurance covers before a storm hits puts you in a much stronger position when you need to file.
4. Which option fits your damage size and timeline?
The right temporary fix depends on three factors: how large the damage is, how long you need protection, and what your budget allows. Temporary protection should be planned around contractor availability and weather forecasts, since blue tarps may fail during extended exposure and cause secondary damage.
Use this decision guide:
| Damage size | Protection needed | Best option |
|---|---|---|
| Small hole or cracked seam | Less than 2 weeks | Roofing cement or flashing tape |
| Minor damage under 100 sq ft | 30–90 days | Blue polyethylene tarp |
| Moderate to large damage | 30–90 days | Professional tarp system |
| Large or complex damage | 3–18 months | Professional shrink wrap |
A few additional points worth knowing:
- Peel-and-stick tape must be applied to dry surfaces for it to bond properly. Applying it to wet or dirty surfaces causes rapid failure.
- Roofing cement works on flat or low-slope areas but degrades quickly on steep pitches exposed to direct sun.
- For commercial properties, shrink wrap is almost always the right choice. The damage scale and insurance documentation requirements make DIY tarps impractical.
Pro Tip: Check the 10-day weather forecast before choosing your method. If a second storm system is coming within a week, skip the tarp and call a professional for a proper anchored system or shrink wrap. The cost difference is far less than secondary water damage.
Key takeaways
Temporary roof repairs protect your home and your insurance claim. The right material depends on damage size, expected wait time, and installation quality.
| Point | Details |
|---|---|
| Match material to damage size | Use roofing cement for small holes; use shrink wrap for large or complex damage. |
| Tarp lifespan is limited | Blue tarps last 30–90 days and fail above 30–45 mph winds. |
| Anchor tarps with furring strips | Wood boards spread wind load evenly; sandbags alone fail in storms. |
| Document before and after | Photos taken before and after repairs protect your insurance claim. |
| Plan for contractor timelines | If your wait exceeds 30 days, shrink wrap outperforms any tarp option. |
What I've learned about temporary repairs after years on storm-damaged roofs
Most homeowners underestimate how quickly a temporary fix can fail. A blue tarp that looks solid on a calm afternoon can be in the yard by morning after a 40 mph wind gust. I've seen it happen more times than I can count.
The biggest mistake is treating temporary repairs as a solved problem once the tarp is down. They are not a solution. They are a delay. The clock starts the moment that tarp goes on, and every day of rain, wind, and sun is wearing it down. The goal is to get a licensed contractor on the roof before that clock runs out.
Safety is the other issue people underestimate. A storm-damaged roof is not the same surface you walked on before. Decking can be soft, shingles can be slick, and the structural integrity of the whole section may be compromised. If you are not experienced with roof work, call a professional for the tarping itself. The cost of a professional tarp installation is a fraction of what a fall injury or a failed tarp costs you.
My honest advice: do the inside containment immediately, document everything with photos and video, then call your insurer and a local roofing contractor at the same time. Let the professionals handle the roof. Your job is to protect the interior and the claim.
— Steve
Chattanoogaroofrepairs: local help when you need it most
A temporary fix buys you time. A permanent repair protects your home for decades. If you are dealing with storm damage in the Chattanooga area, Chattanoogaroofrepairs offers same-day emergency tarping so your home is protected while you plan the next step.
Chattanoogaroofrepairs uses materials from GAF and Owens Corning, carries full insurance, and provides transparent pricing with no pressure. Their team handles everything from emergency roof leak repair to full storm damage restoration, including 21-point inspections before and after every job. Call them the same day the storm hits. Getting a professional assessment early protects both your roof and your insurance claim.
FAQ
How long does a temporary roof tarp last?
Blue polyethylene tarps last 30–90 days under normal conditions and fail in winds above 30–45 mph. Professional shrink wrap systems last 12–18 months and withstand winds up to 100 mph.
Can I do temporary roof repairs myself?
Yes, for minor damage under 100 square feet. Use a properly sized tarp anchored with furring strips, not sandbags. Avoid working on wet, steep, or structurally damaged roof sections.
Will insurance cover temporary roof repairs?
Most homeowners insurance policies cover reasonable temporary repairs as part of your mitigation duty. Keep all receipts and photograph the damage before and after any work.
What is the best temporary fix for a small roof leak?
Roofing cement or peel-and-stick flashing tape works best for small holes and seam failures. Both must be applied to a clean, dry surface for the seal to hold.
When should I call a professional instead of doing it myself?
Call a professional when the damage covers more than 100 square feet, when the roof is steep or structurally compromised, or when you need protection lasting longer than 30 days.